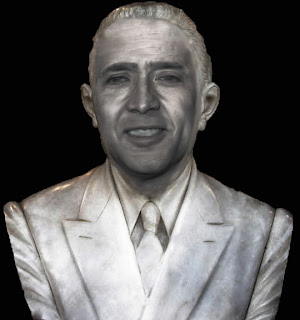
I looked through hundreds of interesting lessons, but in the end found one with several tools I wanted to learn/perfect. I a tutorial called "Turning people into statues." Check out the tutorial here! It seemed at first that it was within my skill level to do quickly, but in the end I spent more than 5 hours, mostly learning to use the mask tool! It took me a while to catch on to some of the tips and tricks that the author assumed we knew.....Anyway getting down to it:
The goal of this tutorial was to take a picture of a person and transform it into a statue or bust. As suggested I started with an existing bust, and found a source picture of a face to blend on to it. I choose Nicholas Cage. See below the beginning photographs.


The next steps were to overlay Cage's face on the statue, transforming it to the correct size, matching hairline, and then masking off all of the parts of his face that wouldn't be needed. I had hoped to do this with simple selection, but as the later steps of the tutorial really forced you to use mask. Again, making this work properly for me took 75% of the time! See the masked overlay below. It was important to put the base bust over top in a transparent mode so Cage's face could be extremely accurately masked. The following picture shows the mask applied and Cage's face overlaid on the base bust.


The next steps involved blurring most of the features to smooth to a stone look, and then applying a great deal of filters, adjustments, and translucent color overlay layers. These various adjustments and color layers allowed the color to be toned down to a constant smooth look, while maintaining the natural reflections and shadows, making the features pop out. Also at this stage some of the major features including eyes, ears, and chin were adjusted.

For the final touches (and what really makes the image) several top layer adjustments were made including contract/brightness, hue/saturation, and custom curves. Combinations of these controls were experimented with for a great deal of time until the final image below was produced.

This exercise proved to be a great learning experience, and added many tools in my photoshop tool box! I still have a long way to go, but each assignment makes me more comfortable with the software.